Tools

Slugline. Simple, elegant screenwriting.

Red Giant Color Suite, with Magic Bullet Looks 2.5 and Colorista II

Needables
  • Sony Alpha a7S Compact Interchangeable Lens Digital Camera
    Sony Alpha a7S Compact Interchangeable Lens Digital Camera
    Sony
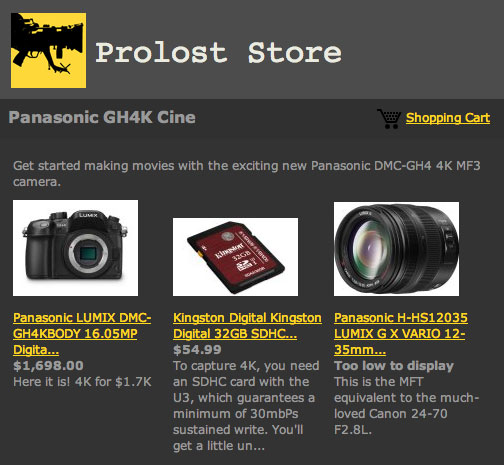
  • Panasonic LUMIX DMC-GH4KBODY 16.05MP Digital Single Lens Mirrorless Camera with 4K Cinematic Video (Body Only)
    Panasonic LUMIX DMC-GH4KBODY 16.05MP Digital Single Lens Mirrorless Camera with 4K Cinematic Video (Body Only)
    Panasonic
  • TASCAM DR-100mkII 2-Channel Portable Digital Recorder
    TASCAM DR-100mkII 2-Channel Portable Digital Recorder
    TASCAM
  • The DV Rebel's Guide: An All-Digital Approach to Making Killer Action Movies on the Cheap (Peachpit)
    The DV Rebel's Guide: An All-Digital Approach to Making Killer Action Movies on the Cheap (Peachpit)
    by Stu Maschwitz

Entries in Color (106)

Wednesday
Jan272010

Make Movies With Apple iPad

Today Apple announced the iPad, and what I like most about what we’ve seen so far is that Apple clearly thinks it’s important that we be able to make things with it. The redesigned iWork apps are impressive experiments in creating stuff using a multitouch display. I liked my iPhone enough when it was just a phone, but I love it now that I have Storyboard Composer (formerly Hitchcock), Screenplay, and Photoshop Mobile, to name just a few.

I also use an app called Air Mouse to control the Mac Mini in my home theater. That, and the many other apps that allow your iPhone or iPod Touch to act as control device for your computer, made me ponder the possibility of using the iPhone’s multitouch screen as a control surface for Magic Bullet Looks. But I never took the idea very far because of the small size of the screen.

Folks doing color correction either know first-hand the value of a dedicated control surface, or avoid finding out for fear of the can’t-live-without-it sensation. An understandable fear, given the cost of these peripherals. Back in 2008 when I wrote about gestural interfaces and hardware devices, I expected to spend a couple grand at the very least for any kind of multitouch control device. Video pros routinely spend much, much more for large, cumbersome, single-purpose color control surfaces. Read any review of them and you’ll see one common thread: once you work a three-way color corrector with a set of trackballs that allow you to adjust multiple parameters at once, you never want to go back.

Imagine the dude above is looking at a stripped-down version of the Magic Bullet Looks interface on his main display. The Tool Chain, Preset and Tool Drawers, and touch-friendly Tool Controls appear on his iPad.

The iPad may seem expensive to people with a laptop, a smartphone, and little room in their life for something in between, but for video and film professionals looking for a general-purpose way to get more touchy-feely with their creations, it’s beyond a bargain.

As long as the software shows up.

So what do you think? Is the image above something that interests you? It’s just a hasty concept—nothing more. But it’s got me thinking about all kinds of ways that an iPad could become a part of the way we make films—not just with dedicated apps, but with companion apps that give us new ways of interacting with our favorite desktop tools.

Tuesday
Jan262010

Color Correcting Canon 7D Footage

A frequent concern about shooting to a heavily-compressed digital format—something the DV Rebel often finds herself doing—is the degree to which the footage will be “color correctable.” Will the shots fall apart when subjected to software color grading? Or will you be able to work with the footage as fluidly as you tweak your raw stills in Lightroom?

It’s a valid concern. The movies that the current crop of HDSLRs shoot are highly compressed. This compression is perceptual, meaning that it takes advantage of visually similar colors and shapes, and represents those regions with less accuracy than the detailed and varied parts of the image. This makes perfect sense, but often in color grading one seeks to enhance color contrasts—to make a face pop off a similarly-colored background for example—and so you may well create high contrasts between colors that were once nearly identical, and as such were given short shrift by the camera’s compression.

You might have noticed a similar phenomenon in audio. An low-bit-rate MP3 that sounds decent enough can suddently sound awful after even a tiny amount of EQ. Another case of perceptual compression limiting your options.

While you will never find as much data and detail in your HDSLR video as you do in that same camera’s raw stills, the H.264 movies created by the Canon 7D, 5D and 1D Mark IV will withstand some massaging in post. Here are some tips (similar to those found in greater detail in The DV Rebel’s Guide) to help you get the best results.

  • Shoot flat. If you read Flatten your 5D, you know that I am a proponent of setting up a “flat” Picture Style using the camera’s built-in controls. The same settings I specced out for the 5D Mark II apply to the 7D and 1D Mark IV as well, although with the 7D I’m less likely to use Highlight Tone Priority, as this setting can increase shadow noise, and the 7D is not as noise-free as the other Canon HDSLRs.
  • Chose WB wisely. Use a white balance preset that gives you as nuetral an image as possible. Shooting with an incorrect white balance reduces your dynamic range, because you wind up with an image that’s prematurely blown-out in one color channel, dark and noisy in others.
  • Expose to the right. Make the brightest image you can without clipping something important. A rule-of-thumb considered gospel by many photographers, but our reasoning is a bit different. Yes, we, like the stills guys, wish to avoid excess noise in the shadows, but that’s not our main concern. Remember that term perceptual compression. Dark areas of an image get less bits. If you underexpose, you’ll have to brighten the image in color correction, and you’ll reveal all kinds of nastiness the camera thought you’d never see.
  • Do denoise. It doesn’t really matter what denoising software you use, but use it. When you carefully and subtly denoise your footage, you rebuild your pixels anew, which is especially nice when you follow the next tip:
  • Work at high bit-depths. If you start with an 8-bit image and do a gentle de-noise, you’re blending pixels values together to create new colors. Although there’s no such thing as something for nothing, doing this at a higher bit-depth means those new colors have massivly more gradations than the original image. Your subsequent color work will hold up much better.
  • Sharpen last. Your flat Picture Style removed the camera’s built-in sharpening. Add your own at the very last step. The amount you use will vary depending on the output medium, so test test test.

By folllowing these guidelines you can make good-looking shots even better with color correction. But what about a shot that isn’t so great to start with? Turns out there’s hope. Below is a 7D shot that I grabbed in an uncontrolled situation. In my haste, I underexposed, and used the “cloudy” white balance when I probably should have used tungsten. But with a little denoising, careful analysis of the colors in the image, and a Colorista Power Mask, I was able to rescue this shot.

Yes, you can color correct your HDSLR footage, and you should. Color correction can make a good shot great, and in a pinch, put an unusable shot back in the game.

Tuesday
Nov102009

Vegas has Mojo

If you’re hanging out with a bunch of editors and you want to play a mean trick on a friend, just find the one guy in the room who uses Sony Vegas (there will be one guy, and only one) and tell that guy that your friend, yeah, the one over there at the bar, he’s super curious about Vegas and would love to hear all about it.

(ProLost, Inc. assumes no liability for what happens next.)

Vegas fans man. They love that Vegas. And they’ll get all up in your blog and be all like, “Dude, Vegas is so underapreciated, and you guys should make Mojo for it, because of all the ruling that Vegas does all the time.”

Well guys, now what happens in Vegas, has some Mojo.

Magic Bullet Mojo, now with support for Sony Vegas.

Now leave my friend alone, he’s not even an editor, he just came for the free drinks.

Wednesday
Sep092009

Magic Bullet Mojo

One of my fxphd shots with nothing more than Mojo applied

If you watched my tutorial on achieving the “Hollywood blockbuster look” using various color correction tools, you probably noticed the consistent theme among the very different example films I showed you how to match—the ubiquitous cool shadows, warm highlights look. Whether the film is bleached of all color (like Terminator Salvation) or super saturated (Transformers: Revenge of the Fallen), and whether it is overall warm or cool, modern films have zeroed in on a color correction style that tends to preserve skin tones and set them off against a cooler backdrop.

The same shot before Mojo

It’s more than possible to achieve this look with Colorista or Magic Bullet Looks (check out the Blockbuster preset—it’s been there since day one). But sometimes you just want to spruce up your footage quickly and easily, without a hundred presets to peruse or a powerful colorist’s interface to manipulate.

Sometimes you just want to take your footage that already looks pretty darn good, and give it a little bit of… Mojo.

Magic Bullet Mojo from Red Giant Software is the pocket-sized screwdriver to Magic Bullet Looks’s cordless driver drill. It does one thing, and does it quickly and easily. It gives you that Mojo thang with just a few simple sliders to adjust, and ships with presets for popular looks.

Unlike Looks and Colorista, Mojo is a bit of a one-trick pony. It’s simple and easy and priced to be an impulse-buy at $99 US. One license allows you to use it in Final Cut Pro, Premiere Pro, Avid, After Effects, and Apple Motion [UPDATE: Now Sony Vegas as well!]. Mojo is also now a part of the Magic Bullet Suite.

Mojo has some cool new features that you’ll recognize from the tutorial video. Since it’s all about skin tones, Mojo has simple sliders for emphasizing, cleaning up, and adjusting skin coloration. It even features a helpful overlay that gives you the same kind of skin-tone guidance for which expert colorists rely on their vectorscopes.

Here are some preemptive answers to questions you might have about Mojo:

Q: Isn’t this look just a cheap gimmick? Just a trend that could pass in a few days/weeks months?

A: Maybe, but in another way it’s an evolution of practices many years old in color correction suites around the world. Is it overused? Sure, but that’s because it works. Personally, I love the way it looks, when done tastefully. We provide the tools, you provide the taste. Try turning the Mojo slider down instead of up when you first apply it.

Q: I applied Mojo but my skin tones aren’t popping.

A: Your faces might be underexposed a bit. Try reducing Mojo Balance—it’s the control that determines what’s a shadow and what’s a highlight. Skin tones tend to fall right in between.

Q: I tried the demo and Mojo makes my footage look terrible.

A: Mojo is designed to work with footage that’s pretty solid to begin with. If what you need is color correction, then reach for Colorista. If you love the way your footage looks before Mojo, try the “Mojito” preset—it’s just a little bit of Mojo.

Q: Why do the sliders have more range in FCP than in After Effects?

A: Actually, they have the same ranges, but in After Effects we can have the slider min/max be different from the absolute min/max. I wish FCP would let us do that too, because the ranges we show in AE represent a “sweet spot,” and the values outside those ranges are kind of pushing things into the red a little.

Q: I already have Magic Bullet Looks, why do I need Mojo?

A: Because you don’t open a walnut with a jackhammer. In my own experience, Magic Bullet Looks is occasionally a bit to much overhead for a quick-turnaround project. Mojo is so quick and easy that I reach for it all the time, saving Looks for those occasions when I want to invest some time into my color grading.

Q: Will you tell my clients I’m using it?

A: No. It’ll be our little secret.

Page 1 ... 8 9 10 11 12 ... 27 Next 4 Entries »