Tools

Slugline. Simple, elegant screenwriting.

Red Giant Color Suite, with Magic Bullet Looks 2.5 and Colorista II

Needables
  • Sony Alpha a7S Compact Interchangeable Lens Digital Camera
    Sony Alpha a7S Compact Interchangeable Lens Digital Camera
    Sony
  • Panasonic LUMIX DMC-GH4KBODY 16.05MP Digital Single Lens Mirrorless Camera with 4K Cinematic Video (Body Only)
    Panasonic LUMIX DMC-GH4KBODY 16.05MP Digital Single Lens Mirrorless Camera with 4K Cinematic Video (Body Only)
    Panasonic
  • TASCAM DR-100mkII 2-Channel Portable Digital Recorder
    TASCAM DR-100mkII 2-Channel Portable Digital Recorder
    TASCAM
  • The DV Rebel's Guide: An All-Digital Approach to Making Killer Action Movies on the Cheap (Peachpit)
    The DV Rebel's Guide: An All-Digital Approach to Making Killer Action Movies on the Cheap (Peachpit)
    by Stu Maschwitz

Entries in Adobe After Effects (83)

Monday
Jun112012

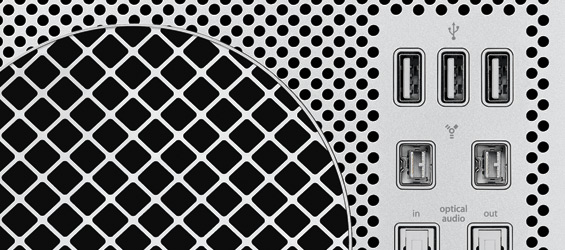
Tall Computers

Today, amidst many exciting announcements about thinner laptops and operating systems, Apple quietly updated their Mac Pro line. As Marco Arment put it:

After two years, the Mac Pro was “updated” today, sort of: now we can choose slightly faster two-year-old CPUs at the top end, and the other two-year-old CPU options are cheaper now.

That’s about it.

Folks who make moving pictures for a living have been eagerly awaiting—and debating the likelihood of—a Mac Pro update. This non-update update does little to squash the debate. Is this a placeholder bump while Apple readies the “real” new Mac Pro? Or is this the death knell for the Apple’s tower line?

When I described the ray-tracing 3D renderer in Adobe After Effects CS6 usable only by those with high-end graphics cards, many commenters took the opportunity to turn it into a Mac vs. Windows debate. That’s not how I saw the problem, but it did raise an interesting question:

Is it Apple’s job to build computers for our (Possibly Adobe) software, or is it Adobe’s job to build software for our (Possibly Apple) computers?

The easy answer is “both.” But there’s more to it than that. Apple clearly showed today a continued commitment to making computers lighter, prettier, and where possible, faster. The emphasis is not solely on performance—performance is one aspect to consider when buying a computer, but Apple has had great success getting customers to consider other factors, such as, you know, what it’s like to actually use the thing.

If Apple continues to focus on thin laptops with long battery life rather than dozen-core towers with $2,000 video cards, should Adobe reconsider its focus on features that require high-end hardware?

Or should Adobe concentrate on making kick-ass software that blazes on modern workstations, and leave their customers to select the best machine for their needs?

“Just get a PC. They’re cheap.” This has been a common refrain in the face of Apple’s seeming disinterest in the workstation market. And it is very true that a pimped-out, top-of-the-line Windows tower can be had for a steal compared to what Apple charges for these barely-reved Mac Pros.

But it’s Not That Simple

If you use a Mac, and you decide that you’d rather run Adobe’s Production Premium CS6 on a “cheap” Windows machine, you’ve got some decision making ahead of you. Most of Adobe’s software (a notable exception being Lightroom) is licensed for one platform only. You can crossgrade your license, but there are some gotchas. If you’re not on the very latest version, you’ll have to upgrade as you crossgrade. But more significantly, your Mac license becomes invalid. If you do the very common (And Adobe-sanctioned) thing of running your CS6 license on both a laptop and a desktop, you can’t split that happy arrangement across OS borders. Switching to a Windows CS6 setup means either giving up CS6 on your laptop, switching to a Windows laptop (ugh), or buying two seats of CS6.

UPDATE: Thanks to those who pointed out that a Creative Cloud membership earns you two platform-agnostic CS6 instalations.

The other issue could be your display. I currently use a MacBook Pro and an iMac. If I bought a Windows tower, I’d need to buy a new display. This is not something I’d cheap out on—you know, because I look at it.

So let’s review. “Get a PC, they’re cheap,” for me, really means buying:

  • A tricked-out PC
  • A high-end display
  • Either a Creative Cloud membership, a 2nd license of CS6, or a Windows laptop (kill me now)

This cheap PC is not turning out to be so cheap after all. And we haven’t even discussed the other software I might need to buy. Not all developers are as enlightened as Red Giant when it comes to cross-platform licensing.

Tower? I Don’t Even Know Her.

I haven’t kept a Mac tower in my home since they were blue. At The Orphanage, I had various Mac and Windows workstations at my desk over the years, but I did most of my work on Mac laptops. Now I split my work between my laptop—often connected to a 30” Cinema Display, and my wife’s iMac.

Of course, I’d re-think that if I was working for paying clients in the room. And even when my only client is me, I’m still not 100% satisfied with my laptop lifestyle. Do I want a pimped-out tower in my office and a lightweight MacBook Air for mobile work and writing? Or do I want a top-of-the-line mobile workstation and a serviceable desktop solution? Could I really run After Effects on an Air? How crazy-making would it really be to use Windows at my office and Mac at home? And sweet mother of internet, which PC would I even get? And which display?

And if I buy a tall computer, am I becoming even more of a niche user than we image-making professionals have ever been—focused on expensive, rarified performance that costs a ton no matter where you find it, rather than on the type of highly usable computers that Apple champions and the world copies? And encouraging Adobe’s rapid skating toward where the puck was a few years ago, rather than pushing them toward creating a great experience on todays lighter, more elgant machines?

Just get a PC, they’re cheap!

If only it was that simple.

Monday
Jun042012

Fast Ray Tracers

Thanks to @quarterlight for the link to this demo of Clarisse, an interactive ray-traced shading and rendering environment that uses the progressive refinement method I mention in my previous post. From the FAQ:

Clarisse is CPU-based. A basic graphics card supporting OpenGL 2.0 is more than enough.

And:

Clarisse runs perfectly fine on lower end hardware such as laptops and remains perfectly smooth and interactive. The What is Clarisse video? was recorded on a dual-core laptop dating from 2009.

This is what I’m talking about when I say that the ray-traced 3D performance in After Effects CS6 could be better optimized for the CPU.

Still not convinced? Then I guess you didn’t click the progressive refinement link in that last post. It goes to an interactive demo of a ray-traced scene that you can interact with, live, at very high frame rates. The real time rendering, which includes secondary light bounces (AKA radiosity), is done in your browser.

Thursday
May242012

Ray Tracing in After Effects CS6

The Best New Feature that You May or May Not be Able to Use

While I was busy making Canadian Lysol commercial history, Adobe released Creative Suite 6, including a major update for my favorite creative software of all time, After Effects. The new version includes some exciting new features:

  • Variable mask feathering
  • 3D camera tracker
  • Global Performance Cache (sexier than it sounds)
  • Rolling Shutter Repair tool
  • Ray-traced 3D extruded layers

Each of these features is worth its own post, so I’ll just pick one to start. The ray-traced 3D renderer is the first major update to AE’s 3D capabilities since they were first introduced in 2001–2002. AE was way ahead of most of its competition (except flame, of course) in bringing 3D capabilities to a compositing environment. At the time, adding 3D layers to a dedicated compositor was a somewhat controversial move. But now it’s hard to imagine compositing without a 3D environment, and After Effects has been lapped several times by its competition in 3D features. So I’m happy to see true 3D geometry finally spinning in my AE viewport.

I could be happier though. The After Effects 3D renderer is a powerful and feature-rich ray tracer. It supports motion blur, depth-of-field, diffused reflections, and soft shadows, all in 32-bit floating point color. The results can look amazing.

But ray-tracing can be computationally expensive. Adobe decided to accelerate their new renderer using the NVIDIA CUDA technology, where the massive parallel processing capability of a GPU is turned to general computing tasks. And indeed, on a supported system, After Effects CS6 can ray-trace pretty darn fast. The above iPhone animation rendered in 2 hours, 15 minutes on a machine with a $2,000 NVIDIA Tesla C2075 GPU. On a Quadro FX4800, it took 15 hours.

The problem is, I don’t don’t happen to own one of these supported systems. My MacBook Pro has an NVIDIA GeForce GT 330M, but that’s not beefy enough for AE6, so I’m stuck with CPU rendering. And my top-of-the-line, pimped-out iMac has an AMD GPU. So again, no dice. And by no dice, I mean you would not want to try to render something as simple as a pair of dice. On my $3,000 iMac, one frame of the iPhone animation takes 48 minutes.

I don’t begrudge Adobe the decision to accelerate the ray-tracer for CUDA, but I do regret the seeming prioritization of that optimization over any kind of CPU usability. If you have a CUDA card, you can use and enjoy the ray tracer. If you don’t, you pretty much can’t. I mean, sure, you can try, but the render times will very likely dissuade you. This binary hardware differentiation between the ray-tracing haves and have-nots is, to me, unbefitting of After Effects, which has always struck me as the “people’s choice” compositor—such a paragon of accessibility that I consider it a must-have tool for the DV Rebel. I expect Autodesk to ship something that requires esoteric hardware, but not Adobe. And yet, at the same time as the CS6 announcement, Autodesk announced a greatly updated Smoke for Mac, one of the primary features being that it works on just about any Apple hardware, including my iMac.

But surely it’s impossible that a ray-tracer could ever be as fast on a CPU as on a GPU, right? Maybe—but there are numerous well-established optimizations available to ray-tracers, including sub-sampling (where areas of sparse sampling are interpolated rather then allowed to be noisy), adaptive sampling (where the number of ray samples required for each pixel is adjusted based on scene content), and progressive refinement (where low-quality results are shown to the user rapidly, and then iteratively built-upon for higher quality). The After Effects ray-tracer has none of these. It’s a brute-force multi-sample renderer—the kind you’d write if performance in a massively-parallel computing environment (i.e. a specific GPU) was your sole concern. I wish Adobe had put their efforts toward making their renderer as fast as possible for all users.

I know it’s fashionable to hate on Adobe, but I have never felt a part of that crowd—probably because the Adobe tools I use, After Effects and Lightroom, are shining beacons of awesomeness within the company. I’m quite the opposite of an Adobe hater. So seeing After Effects sprout a feature we’ve been anticipating for a decade, only to have it tie users to specific, high-end hardware, feels a bit like seeing a good friend make a bad life decision.

As more and more of us use laptops as our primary machines, and as those laptops are getting smaller and lighter rather than necessarily more powerful, Autodesk is heading in the right direction, and Adobe is not. This, to me, was the big surprise of the post-production announcements at NAB 2012.

Want to know how I rendered these sample movies? I tried doing it on my mini-render farm of CPU-only machines, but it took days (of my laptop being too hot to touch) to produce unacceptable results. Smooth motion blur, fuzzy shadows, diffracted reflections and depth of field require a lot of samples (controlled by the anti-aliasing setting), and if I turned up the quality enough to stop seeing noise (for the iPhone, that was 14), those renders would still be going today. So I sent the project files to a friend with a CUDA GPU. A friend who happens to work at Adobe.

Wouldn’t it be amazing if you could do that too?

No, seriously.

Along with CS6, Adobe unveiled Creative Cloud, which includes subscription pricing for the Creative Suite applications. But is that really what After Effects power-users need from “the cloud?” What if that subscription also gave me access to a cloud-based render farm that is constantly Backblaze-syncing with my work directories and is ready to instantaneously render my 1,000-frame animation on 1,000 virtual machines at the push of a button?

Then what if Adobe removed the button?

It used to be my dream that After Effects would speculatively render my work in the background, using every ounce of my computer’s processing power. Now I want the same thing, but with Adobe supplying the processors. That would be worth a subscription fee.

The “big iron” days are over. Simplicity is the new powerful. Fast is the new good. The computer is the new hardest working guy in the room. Except it’s no longer in the room.

I can’t wait for my favorite creative software of all time to realize that.

Sunday
Nov202011

Pimp Your After Effects

Adobe After Effects is my go-to tool for most homebrew VFX and finishing tasks. It has the perfect blend of powerful features and editorial, layer-based ease of use. Is it as fast as a dedicated color grading system, or as responsive and powerful as Nuke for VFX compositing? No, but it offers a flexible, creative environment that’s tough to beat for the kind of creative, rough-and-tumble cinematic problem-solving that comprises most of my work.

After Effects is a professional tool by any measure, but it is designed for a broad user base. So an artist who plans to push it hard will want to tune the application accordingly. Here’s what I do to a default installation of After Effects to prepare it for my special kind of abuse.

Preferences

There’s a lot you can adjust within the standard After Effects Preferences window. Here’s what I set, and why:

  • I set Levels of Undo to 99, because why should I expect to have fewer problems than Jay-Z?
  • Enable Allow Scripts to Write Files and Access Network, so that you can run some very cool scripts. More on that below.
  • I turn off Use System Shortcut Keys, because on my Mac, Command + M should map to Composition > Make Movie, not “purposelessly minimize the entire application in the most annoying way possible because I never learned Command + Tab for application switching.” This setting is a must for any Mac user who prefers using After Effects to hiding it.

  • Under Previews, I set Zoom Quality and Color Management Quality to More Accurate. The latter especially matters if you use After Effects’s built-in support for a color managed linear-light workflow. You’ll see nasty banding during RAM previews at the default Faster display color management.

  • Under Display, I turn on Show Rendering Progress in Info Panel and Flowchart. Although this may slightly slow down your interactive rendering, it’s worth it to be able to see what After Effects is doing under the hood. Be sure to expand the Info Panel vertically so that you can see the text display of the render activity.

  • Under Import, you can set the default file sequence frame rate. I don’t know anyone for whom the cretaceous factory setting of 30 fps is useful. I set it to 23.976, but a PAL person might choose 25, and an NTSC nerd should probably choose 29.97.

  • The After Effects Disk Cache (under Media and Disk Cache) is a splendid feature that is rightfully switched on by default, but you may want to both increase its size and choose a location for it on your fastest volume, preferably not the one where your media is stored.

  • Appearances matter to pros, and under the Appearance section I always darken down the UI a bit,

  • Turn on Cycle Mask Colors (so that each new mask you create will be a different color),
  • And turn off Use Gradients. This UI preference was once offered to boost performance, but now is simply an aesthetic choice. I think After Effects, like almost everything, looks better without superfluous gradients. I wish Premiere had this option.

  • Under Auto-Save, I always enable Automatically Save Projects.

  • I Save Every 5 Minutes. Yep.
  • And I set Maximum Project Versions to 20.

  • Memory and Multiprocessing is one of the most critical areas for tuning your After Effects instal for the best results. Here you can make After Effects fly like a bird, or bring your machine to a crawl.

    And I have absolutely no idea what to do here. I’m not joking. The day I understand these settings is the day Adobe removes them.

    I would sooner fiddle with switches on a cockpit tour of a 747 I had just boarded for a transatlantic flight than touch this stuff.

Project Defaults

There are some settings in After Effects that are invisibly established as you use the application. After Effects will remember your choices and default to them in the future. Some I find important enough to preemptively set up.

  • I choose File > Project Settings, and select Frames as the Time Display Style, and set Frame Count to Start at 1. You’ll still see a timecode display in your timeline, but the primary expression of time will be in frames, which is much easier for me to conceptualize and type. This is very much a matter of personal preference.

  • Then I create a new Composition, and without doing anything else, I tap the Shift key. This brings up the Composition Mini-Flowchart, which is a really spiffy navigational tool that any Pro AE user should embrace. It solves the single biggest problem with After Effects—the lack of a visual way of navigating between Compositions. The problem is that, by default, it’s backwards. Find the menu button in its upper right corner and select Flow Left to Right, and never worry about this again.

Text Prefs

There is a secret world of After Effects customization. Like rigging your Nissan Skyline for NOS, this is purely an at-your-own-risk endeavor—but the rewards can be mighty.

Mac users will find the After Effects preferences file here:

/Users/[username]/Library/Preferences/Adobe/After Effects/
[version number]/Adobe After Effects 10.5-x64 Prefs

And Windows users here:

\Users\[username]\AppData\Roaming\Adobe\
After Effects\[version number]\

In those directories you’ll find a file called something like Adobe After Effects [version] Prefs. This plaintext file is editable with any text app. Use a search to find these areas and make careful changes. But don’t worry too much—if you corrupt this file, just delete it. After Effects will create a new one with the default settings. You can also make a backup of this file right there in the same directory. And eat your vegetables.

Here are the changes I make in the text prefs:

  • "Show Tracker Apply Dimensions Dialog" = "0"

    By changing this from 1 to 0, you defeat the annoying dialog box that comes up after a 2D track asking you if you want to apply the tracker in X, Y or Both. You always choose both, because as a pimp, you know how to extract one dimension later if you need it. So save yourself the annoyance of being asked if you’re a doofus each time you track.

  • "Cone Size" = "0"

    The text above this line gives you the clue as to what it does: ["3D Light Dimensions Preference Section"]. Here you set a number of “pixels” to use for the size of the spotlight cone widget in 3D views. No matter which size you choose, it will usually be wrong for what you’re trying to do. Unless you choose zero—in which (special) case, After Effects will draw the cone all the way out to the Point Of Interest, matching the behavior of most 3D apps. Nice.

  • "Pref_TRANSPARENCY_GRID_COLOR1" = 00888888
    “Pref_TRANSPARENCY_GRID_COLOR2” = 00666666

    Photoshop has a preference for setting the brightness level of the checkerboard backdrop used to show transparent areas in your image, but After Effects lacks this control—unless you’re elbow deep in this text file with a scalpel like we are now. Make the above changes for a nice dark gray checkerboard that better matches your gradient-free, subdued AE UI.

  • "Mouse Wheel Zooms Around Pointer" = "1"

    Setting this to 1 will cause the scroll-wheel zoom to center around the mouse cursor rather than remain fixed to the center of the image. Although it can cause some disorientation at first, this mode is more like other apps with scroll-wheel zooming, and can speed your work by eliminating the need for panning around after a zoom.

Scripts

Scripting in After Effects is very powerful, and luckily for we minor nerds, its power can be harnessed with little technical know-how. There is a rich community of scripting resources online; some cheap, many free.

  • An indispensable source of AE scripting awesome sauce is aescripts.com. Here you will find Load Project or Template at Startup. Drop this script in your Scripts/Startup directory and it will run every time you launch AE. And what it does is what it says: it opens a project file that you’ve specified. The same one, every time you launch AE.

    Why is this awesome? I’ll let the script’s creator, Lloyd Alvarez, explain:

    For example, if you have a certain folder/file structure or camera rig, etc that you like to keep for your AE projects, you can setup a virgin project the way you like it and save it as a template by giving it a .aet extension. Now every time you launch AE your custom setup will be automatically loaded.

    These .aet template files are unique in that, after opening them, you’re still in an unsaved, un-named After Effects Project. So you’ll never accidentally save over your template. My template contains camera rigs, folder structures, letterbox presets, and other goodies that I always seem to need.

    Price: Name your own price.

  • I’ve written about BG Renderer before. It is just unbearably useful. Render in the background and keep working, or, better still, render in the background and go take a “walk” (an ancient Sanskrit word meaning “nap”), confident that your phone will alert you to a completed render.

    Price: $29.99 (for the version that supports alerts) and worth every penny. This is my first suggestion that costs money so let me be blunt: If this sounds expensive to you, you should have stopped reading at “pimp.”

  • The DV Rebel Tools, once only available with the DV Rebel’s Guide, now free, are a set of scripts that turn After Effects into a powerful color correction and mastering tool. Learn more and download here.

  • There are many more scripts that I use routinely, too many to list here. Be sure to peruse aescripts.com, and keep an eye out for the redefinery scripts. These are the after-hours work of Adobe engineer Jeff Almasol, who also helped me make the DV Rebel Tools a reality—and some of them are similarly based on humble requests by yours truly.

Pimpin’ Ain’t Easy

Settings will only get you so far. The fully-pimped AE setup will include custom hardware, third-party plug-ins, calibrated displays, special input devices, chairs with umlauts in their names, and espresso gear. But some of these simple textual tweaks will dramatically change your After Effects experience.

Now go on, brush your shoulders off.

Page 1 ... 2 3 4 5 6 ... 21 Next 4 Entries »