Tools

Slugline. Simple, elegant screenwriting.

Red Giant Color Suite, with Magic Bullet Looks 2.5 and Colorista II

Needables
  • Sony Alpha a7S Compact Interchangeable Lens Digital Camera
    Sony Alpha a7S Compact Interchangeable Lens Digital Camera
    Sony
  • Panasonic LUMIX DMC-GH4KBODY 16.05MP Digital Single Lens Mirrorless Camera with 4K Cinematic Video (Body Only)
    Panasonic LUMIX DMC-GH4KBODY 16.05MP Digital Single Lens Mirrorless Camera with 4K Cinematic Video (Body Only)
    Panasonic
  • TASCAM DR-100mkII 2-Channel Portable Digital Recorder
    TASCAM DR-100mkII 2-Channel Portable Digital Recorder
    TASCAM
  • The DV Rebel's Guide: An All-Digital Approach to Making Killer Action Movies on the Cheap (Peachpit)
    The DV Rebel's Guide: An All-Digital Approach to Making Killer Action Movies on the Cheap (Peachpit)
    by Stu Maschwitz
Monday
Nov252013

Thanksgiving Sale at the Prolost Store

I love Thanksgiving, because a) food, and b) my family is the good kind of crazy.

So take advantage of my good spirits and save 30% on everything at the Prolost Store! Even the free stuff.

Just use the coupon code CANBERRY when you check out. The sale lasts through Monday, because it makes me laugh when people say “cyber.”

Happy Holidays!

Thursday
Nov212013

The Perils of Home Theater

I love movies, and have always wanted a great home theater. This year I decided to build one. It’s been a daunting, exciting, and ultimately rewarding process. I’ve wanted to write about the experience of researching and installing this combination studio and theater, but I honestly haven’t known where to start.

Not knowing where to begin is such a classic form of procrastination that I’ve decide to skip “beginning” entirely. Instead, I’m going to jump into the middle, with a tiny detail of my setup—one that vexed me for days and caused me to watch movies incorrectly for about a week.

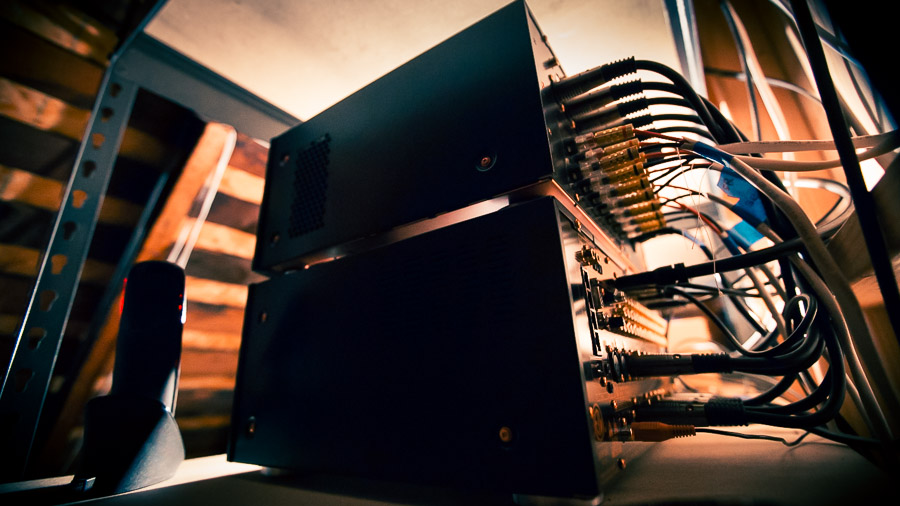
My Blu-ray player is a Sony Playstation 3. It is connected via HDMI to my pre-amp, which is in turn connected to my projector via another HDMI cable. It’s about the simplest possible configuration, and yet each noun in that last sentence is easily worth an entire post on its own. You can see why I’ve found the prospect of documenting this so daunting. Nevertheless, I’ll dodge the ratholes and plug onward with my two-day ordeal that boiled down to one incorrect setting.

My theater is in a large room, so I opted for a 7.1 system. This means that in addition to left and right surround speakers, I also have a pair of rear surrounds, for a total of seven primary speakers. I figure most of you know all about this, but if you’d like a refresher, here’s a good article on the basics of 5.1 and 7.1.

Most home theaters not only don’t require 7.1, but they could even be compromised by the addition of rear surrounds. The purpose of the surround channels is to provide an immersive, ambient soundfield. In many home settings, it’s hard enough to position two surround speakers correctly. My theater room is large enough and has enough space behind the viewer that I could add the additional two speakers for 7.1.

But I didn’t do it at first, because I needed to build custom mounts to allow the flat-backed speakers to hang vertically off my pitched, open-beam walls. I documented this process on Twitter, from my SketchUp plans to my first cuts, and finally to staining and hanging the mounts.

Prior to this project, my rear surrounds sat in their box for months, and many a movie was watched in “only” 5.1 channels. I assure you, no one complained.

When I finally got the rear surrounds mounted and wired (speaker wire is another perilous rathole to dodge for now), I popped in Pixar’s Brave, which features an optional 7.1 Dolby TrueHD soundtrack. I waded through the punishing pre-menu crap that defines the Blu-ray experience, selected the 7.1 option, and played the movie.

And no sound came out of my rear surrounds.

The 7.1 of Silence

This launched me down a two-day path of trying various disks and various settings. I won’t bore you with the details, but there are a few salient points:

Many Pixar Blu-rays come with a home theater setup “maximizer,” lovingly made by some very smart folks at Pixar who care about your home viewing and listening experience. Found under Setup in the menu, it features discrete test tones for all six or eight of your audio channels.

In my case, different disks failed in different ways. Brave and Monsters University sent no sound to the rears, but Cars 2 (a DTS disk) did, just mixed up with the other surround channels.

There are also discrete channel test tones on the Digital Video Essentials: HD Basics disk, and my system passed their test. HD Basics was able to send a discrete sound to the rear surrounds. So not every disk failed.

At some point you have to stop futzing and start enjoying, so the wife and I popped in Tron: Legacy (a DTS disk which did send sound to the rears), and watched it. Or rather, listened to it, because as pretty as the film often is, it’s the soundtrack that inspired me to buy the disk.

The Daft Punk soundtrack filled the room. It sounded great. I was singing the praises of 7.1—despite a nagging feeling that something was still amiss.

There’s a scene in Tron: Legacy where someone knocks at a door positioned directly behind the viewer. The knocking seemed to originate directly from the back of our theater. Michelle even turned her head, perfectly illustrating one of my big reservations about aggressive 7.1 mixes. Localized surround events can sometimes be the opposite of “immersive,” reminding you that the visuals, unlike the sound, are happening only in a window in front of you.

As a home theater nerd, you want a disk or two on hand that will really show off the system, but, if you’re like me, you’ll find that your favorite movies are more reserved in their surround mixes. Surround should be subtle, and when you install 7.1 at home, you’re paying twice as much for a little more subtlety.

The next day, I did some more troubleshooting. I suspected that Tron, like the also-DTS Cars 2, was being mixed down somehow and sending identical signals to the surrounds on each side. I found the scene with the door knock, and stood next to my LR surround. The knock played equally in the SR and the SBR.

Confident now that I had yet to actually hear true discrete 7.1 in my theater, I resumed my research, and found this article at Engadget, which contained the answer.

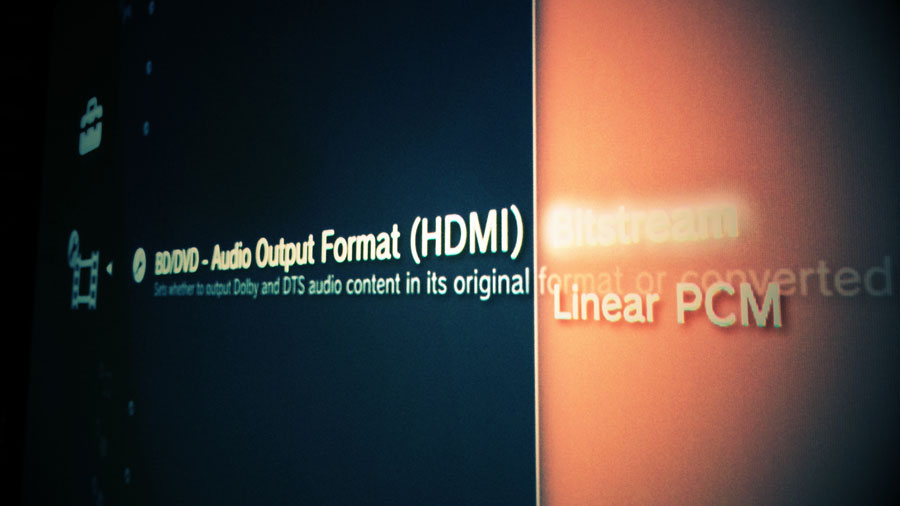
In the video settings on my PS3, I has somehow set HDMI to output digital audio as “bitstream” rather than Linear PCM. Read the Engadget article for more on what that means—but in my case, the ramification was that I wasn’t getting true 7.1.[1]

Even though I knew that the PS3 needs to decode 7.1 itself and output it as uncompressed discrete channels (LPCM) as opposed to sending the unprocessed audio track and letting the receiver do the decoding, which already put me into a niche group of well-researched home theater nerds, this incredibly critical audio setting was buried in the Video settings, so I’d missed it.

I switched my HDMI audio output to LPCM and returned to the knocking scene. Now the knock came discretely out of the rear surrounds.[2] The Maximizer on both the Dolby and DTS Pixar disks sent discrete signals to each channel. Victory!

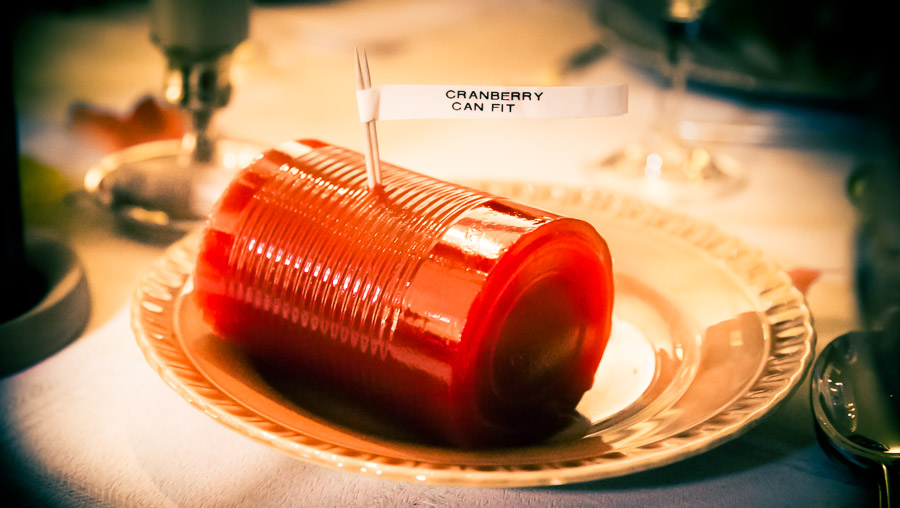
A Chapter About a Bolt

In The Hunt For Red October (the book), Clancy begins a chapter with a detailed description of a single bolt in a helicopter—how it works, and how, on this particular day, it failed. Here, I’ve written over a thousand words to describe how I got one simple setting wrong on my Blu-ray player, and wound up stuck for days not getting the most out of my home theater. While no one will make an awesome movie about my experience, I do think it was worth sharing, and I hope you agree.

Setting up a home theater is fraught with just this kind of pitfall, and clear, concise articles like that one from Engadget are rare. But even more rare is clear, trustworthy information on some of the less pushbutton-oriented aspects of home theater. There are endless debates about speakers, endless opinions on how much you should spend on cables, and hundreds of “experts” with fringe opinions and loud voices. There’s an entire industry of home theater and audiophile exploitation that I waded through in order to get to the point where I could be one, simple setting away from hearing movies correctly in my home. If you’re interested, I’ll write more about this in the future, in the hopes of cutting through some of that noise.

Right after I comb through my Blu-ray library for another 7.1 movie to watch.


  1. The HD Basics disk didn’t fail because it’s only 6.1, which can be sent over HDMI as Bitstream from a PS3.  ↩

  2. Why did the door knock seem so perfectly isolated to the rear in our initial, mixed-down viewing, when it was actually evenly distributed among all four surround channels? That’s a great rathole for a future post.  ↩

Tuesday
Nov052013

Nikon Df vs. Canon 5D Mark III vs. Fuji X100S

Recent retro camera fashion has, refreshingly, brought back “real” camera functionality. But covering a camera with knobs and dials isn’t automatically a win.

Nikon has announced the Df, a 16.2 megapixel, full-frame, retro-styled DSLR. And oops, no, that’s not a picture of it above. That’s my trusty Nikkormat that my dad gave me as a high school graduation gift. I have lots of Nikon lenses left over from those days, along with an abiding affection for the company, burned into my muscle memory by the wonderful heft and feel of a solid, manual camera with satisfyingly clickable buttons and dials.

So I, along with the rest of the photography world, watched with interest as Nikon expertly teased the Df with a series of videos. The brief glimpses—and the satisfying clicks in the soundtrack—seemed to promise a return to this tactile, manual photographic experience.

The camera is announced now, and available for preorder at about $3,000 with the matching (fashion!) 50mm lens.

Here’s the actual Df

I like that retro styling is becoming a way for camera makers to demonstrate their commitment to serious photography, because pretty cameras are pretty, but mostly because physical knobs and dials are often better than menus for common camera functions.

But as great as these physical UI elements look, what really matters is how they feel. As I wrote back in 2008, we should not lust after specs or superficial qualities of a camera, but instead seek the most transparent possible liaison between our artistic intent and the images we want to make.

No one who hasn’t touched a Df knows how it fares on that front. So I turned, as I often do, to my buddy Gordon Laing and his amazing Camera Labs site. He spent some time with the Df at a recent Nikon press event.

Retro styling is all about nostalgia, but industries move on for a reason. So in order to be successful with a retro concept, I believe you have to serve it with a generous dollop of the modern too. Trouble is, this is not always an easy balance to get right.

Gordon seems to conclude that Nikon didn’t quite get it right. For myself, I’ve concluded that I already own an expensive, hefty, full-frame DSLR—and while it might not look hipster-retro, it feels great, and using it is second nature to me. Upon closer inspection today, I was reminded that it is, in fact, covered with knobs and dials.

Oh, and it shoots video too, which the Df does not. And it has more megapixels, and a faster shutter, and a dial that adjusts shutter speed in 1/3 stop increments (instead of full-stop), because it’s designed to work well, not just look cool.

The same can be said for Nikon’s D800, which beats out the 5D Mark III in many comparisons.

I love my big old 5D Mark III, but I am not immune to the allure of a retro body. For me, the right choice there is something very different from my interchangeable lens photography experience. Earlier this year, I bought a Fujifilm X100S. It’s a 16MP APC-C camera with a fixed 23mm ƒ2.0 lens that sells for “only” $1,300. It’s small enough that I take it places I wouldn’t take my DSLR (such as a wedding at which I’m the best man), it makes nice pictures, and while it’s nice that it looks great, it’s even better that it feels great. And to me, it nails that retro/innovation balance that Gordon so eloquently described. It has focus peaking for manual focus assist (a feature that requires stills camera makers to step outside their comfort zone and adopt something every video shooter knows is great), and a clever hybrid viewfinder that’s always the first thing I show off when folks are curious about the camera.

I’m not accusing Nikon of stepping over the fashion/functionality line with the Df. That’s a decision that every photographer should make for themselves, preferably by feel. I’m honestly thrilled that companies like Nikon, Fuji, and Sony are competing for turf that used to be owned expensively and complacently by Leica. There are now numerous ways to bring a physical, retro feel to your photography experience, and much to consider before you spend your modern dollars.

I won’t be buying the Df, but if you do, consider using this link to support the site.

Thursday
Oct312013

Coloring M is for Marmalade

Warning! This is a horror short. It’s all scary and stuff. Once again, you are my mom, skip this one.

My buddy Gus Kreiger wrote and directed this short called M is For Marmalade, his entry into the ABC’s of Death 2 search for the 26th director competition. He sent me a rough cut and I liked it so much that I asked if I could do the color grading.

Before we go any further, please take a moment to watch and throw a Facebook Like at the short. The competition is still on, and Likes help Gus win, which would mean his work appearing in the feature film!

Do it.

OK, thanks. Now, about that color grading!

Gus sent me a ProRes render of his locked cut, along with this email:

First chunk – through the BEEP! at 0:39 – should have a slightly washed out Minority Report/Alfred imploring Bruce in the stairwell of Dark Knight Rises look. After that, with the switch to the kitchen at 0:41, it should jump to a brighter/more vibrant look: we’re in a “different” place.

The vibrancy should then get less and less with each shot so that by the time we’re back to the “bad” place – the drag at 1:17 – the Minority Report look has crept back in. A Blake Snyder “synthesis” moment, if you will, but the “vibrant” shouldn’t go away entirely, as I like that the shots are “pretty” when I’m, like, sawing her arm off.

Final scene at the table (2:39) through end should be very good-looking indeed. Eerily so. Idyllic.

I loved these notes. “Minority Report/Alfred imploring Bruce in the stairwell of Dark Knight Rises look” is a concise description that immediately filled my head with images. I didn’t even look at those films before diving in—I felt that basing my work on my memory of what those scenes look like was the better way to go.

I colored the short using Magic Bullet Looks and Colorista II in Adobe After Effects CC. I used Magnum - The Edit Detector to automatically divide the clip at the cut points. I then placed markers on my hero frames—sometimes more than one per shot—and ran the Make Thumbnail Comp from the DV Rebel Tools. This created a comp for me with thumbnail representations of each shot, automatically fit into a single HD view. As I showed in the tutorial, my workflow is to keep my main color correction Comp View locked on the left, and the thumbnail Comp View locked on the right.

Click to enlarge

Gus’s desire to tell his story through the contrasting cold and warm “worlds” that eventually collide, worked perfectly with my usual workflow of spanning “look” adjustment layers over several clips in a sequence, and then dialing in each shot for consistency underneath that look.

The look layers, shown here in orange, hold single instances of Magic Bullet Looks. Here’s the setup for the warm, happy look:

Here’s the Look for the cool section:

Note that each is quite similar in setup. Both have Diffusion to reduce contrast, a Colorista 3-Way Tool to set tone, and a Ranged HSL Tool to restrict and define the palette. The scenes occupy a similar, complimentary slice of the Hue/Saturation scope, each weighted to opposite sides of the wam/cool divide.

For the “synthesis” scenes, where warm meets cool, I decided to express this collision using a cool overall tone that would fight with warmer, glowing highlights trying, and largely failing, to bleed through. So I added a second Diffusion Tool, operating to some extent only on highlights (Highlights Only set to 10%), and then pulled the midtones way down into the Colorista 3-Way Tool. To me, this created the feeling that a warm, sunny day was happening just outside the windows, trying to get in, but was being clobbered by the cold, scary stuff happening in the room.

The short was very well shot by Jeff Moriarty (on a Canon 5D Mark III), so I didn’t expend too much effort on shot-to-shot consistency. But one of the things that got me excited to take this on was that Gus and Jeff rarely repeated a setup, so there were many gorgeous, independent snippets to bring together into one consistent story. So I made some shot-by-shot tweaks, mostly to keep objects consistent in color.

The skin tone of actor Amelia Gotham was very important to me in those opening, cool shots. There was one shot where the light flaring the lens was washing her out enough that I used the Colorista II Keyer to bring her back, just a bit.

In other shots, I used the Colorista II Power Masks to selectively darken areas of the frame. Here I darkened the area outside the doorway:

I got most of this done in about half a day, and I shared the thumbnail view with Gus as well as a rendered output. He came back with a few minor notes.

After Gus approved my next pass, I turned on Denoiser II (also part of the Red Giant Color Suite) for the entire timeline and rendered out the final ProRes movie, which I then Dropboxed to Gus. Denoiser II was essential in cleaning up the compression and other noise that Canon DSLR footage is famous for, and it allowed me to push my color choices much farther than I otherwise would have.

I sharpened the final comp and reintroduced a tiny bit of noise, and rendered the final ProRes with 32-bit color processing in After Effects.

Here’s a gallery of before and after frames (larger here):

Thank Gus, for letting me help with this short, and allowing me to share the process here.

Happy Halloween!

Page 1 ... 6 7 8 9 10 ... 146 Next 4 Entries »